Well, work began about mid-December, IF my memory serves me correctly. In Phase I, all I really showed you in the photos was the two-foot deep ditch for the electrical and data lines....plus what my present storage area looked like...CROWDED!
Click here to see that first post about The Quilt Shed.
I have now taken over 180 photographs of the building process of my DREAM SHED, but won't bore you with all 180 of them. Let's see if I can pare it down to a manageable size -- say 35 or so.
 |
| The barest of bones begins!. |
After the electrical ditch was dug and the pipes for those lines were laid and buried, the piling footers were poured and the main structural beams set in in the ground.
 |
| I like the way they reinforced those support posts. Gives me a nice comfortable feeling. |
 |
| It's still not quite real to me yet. |
The view from this far back in the yard from this exact position won't be available for much longer.
 |
| Floor braces go in. |
 |
| Finn in the foreground. |
Finn is the very lovable 2 year old Black Lab who belongs to one of the carpenters. He came almost every day the first couple of weeks and I always had to go out and play with him. He loved to retrieve. He also began to find deer bones in the woods and drag them back into the yard!
 |
| The sub floor goes in. |
 |
| I love the energy that builders bring to the site! |
For some reason, I didn't get any photos of the sides going up! Maybe they went up while we were gone over Christmas. Probably did.
 |
| No roof yet but the trusses are all in. |
 |
| This lovely "little" machine lifted the roof trusses into place. |
Now the building seems REAL to me!
 |
| Glad I don't have to climb a ladder all the time to get in any more! |
It didn't seem so far off the ground to me at this point. Don't know why. It sure did once the deck was in!
 |
| Should I addd the picture window now or in a few years? |
I had a large window "framed in" for the next generation to add when they wanted to (plus a door near the back of the shed). But once I was inside the building, I decided I wanted the choice of more light when and if I wanted it
now. The guys will just order a window and cut the opening when they are ready to add it. I will keep this window covered most of the time to protect the textiles.
 |
| This really is a lovely view. |
(Above) I am looking thru the small window at the back of the building and through the the building to the front door. YO can also see the lovely light thru the trusses above the door that are not yet covered up. Makes me wish I could put glass up there too! But I am building a textile storage shed; not a house!
 |
| Looking back at the house. The orchard is off to the right. |
 |
| The trusses create a lovely pattern against the sky! |
 |
| View from my sewing room. |
Do I finally have my tree house?
 |
| We added shingles under the eves to match the house. |
 |
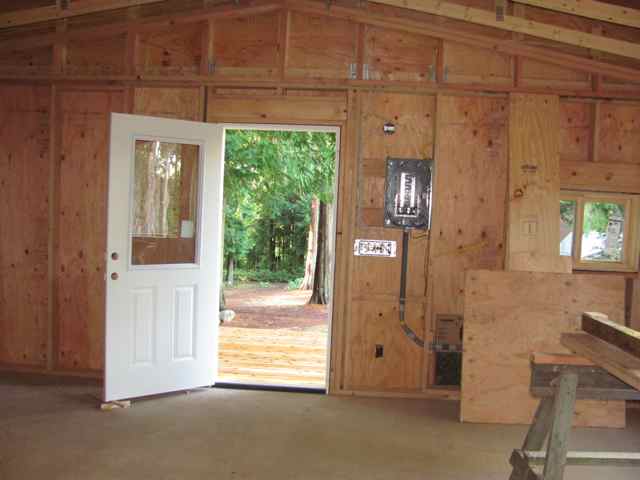
| A very empty interior. |
Look quick! Once I start moving in you will never see another view like this....empty space!!
 |
| The main part of the deck is now up. |
Man, we went around and around trying to decide where to put the door, deck and stairs. Common sense told me to run the path all the way back to the back corner of the building so that I would have only 3 stairs to climb. But commons sense did
not prevail. I loved the feeing of being in a "tree house", so high end it is!
 |
| What a great crew to work with! |
So now to decide how few stairs I can get by with from the steep end of the building!
 |
| Adding a smaller, lower deck will help. |
I now have a swinging gate off this lower deck. All I have to do is open it and set my boxes up on it. Then I only have to carry heavier stuff up three steps instead of having to climb all seven with my arms full!
 |
| Windows go in. |
 |
| Love all the sun in there but will not actually be able to allow it very often. |
 |
| Lots and lots of light switches! |
 |
| Love the tools! Reminds me so much of my childhood when Dad taught shop! |
 |
| The back wall. |
Wait till you see the built-in shelves that are going in here!
 |
| Front door. |
My desk will be to the right in the L-shaped corner with a small window over my left shoulder and a small window directly in front of me. I don't know how often I will actually work out there. I'll have to "play" at office for awhile once I move all my stuff in. I don't think I will move all my books out there but my paper files will be out there. Aan without a restroom out there...well, let's just say I'm not getting any younger!
 |
| Skylights. |
Yes, I will have two skylights. But there will be special blinds that I can close them from down below.
 |
| Little shed in the snow! |
 |
| Love the look of the place from this angle! |
 |
| Front with deck and railing in place. |
Will probably put a skirt around the deck. And of course, the yard around it will have to be re-landscaped!
 |
| WA-LA! BOOKSHELVES! |
What did I tell you about those built-in shelves! Magazines will go on the narrower shelves around the window. On the right you can see the edge of my two flat but angled quilt-storage tables!
 |
| These babies are sturdy and moveable. |
Both flat-beds also have lots of storage space under each with access from 3 different directions.
However, the oldest quilts and tops will store flat on these two angled flat-beds.
Moving day begins...
 |
Don't you think this says it all?!!
|
Thanks for stopping by to visit my blog today! Please leave a note. Maybe you have a suggestion for organizing quilt stuff that has proven useful for you!! One can never have too much quilt stuff, right?
KarenQuilt in the Islands